
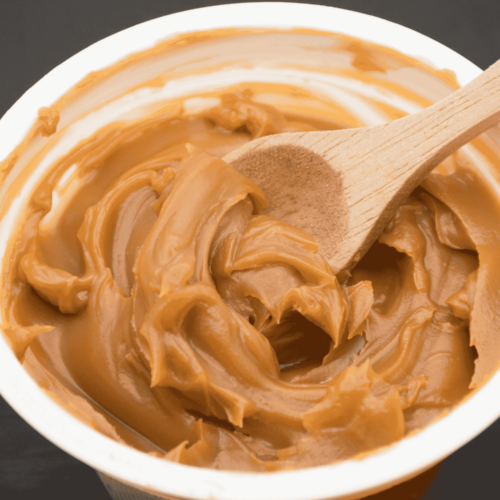
Arequipe (Colombian Dulce de Leche)
Traditional Colombian Arequipe is a rich, smooth caramel made from milk and sugar slowly cooked until golden and glossy. Perfect as a spread, dessert topping, or filling for wafers and pastries, it captures the heart of Colombian sweetness.
Equipment
- Heavy bottomed pot
- Wooden spoon
- Sterilised jar or dish
Ingredients
- 1 litre whole milk
- 300 g granulated sugar
- 1 tsp bicarbonate of soda
- 1 vanilla pod split (or 1 tsp vanilla extract)
- Pinch of salt
Instructions
- Pour the milk into a large, heavy bottomed saucepan to prevent scorching. Add the sugar and stir gently over medium heat until it dissolves completely. Do not allow the milk to boil at this stage.
- Stir in the bicarbonate of soda, vanilla, and a small pinch of salt. The mixture will foam slightly, which is normal. The bicarbonate helps prevent the milk proteins from curdling during the long cooking process.
- Lower the heat to a gentle simmer. Stir frequently using a wooden spoon or heatproof spatula, scraping the bottom of the pan to prevent sticking. Continue this for about 45 minutes, keeping the heat steady.
- As the mixture thickens and deepens in colour, stir more often to prevent burning. The milk will gradually turn a golden caramel shade, releasing a nutty, sweet aroma. Patience is key here; allow it to develop naturally.
- After around 1 hour and 15 minutes, test a small spoonful on a cold plate. If it holds a soft shape and spreads like thick caramel, it is nearly ready. Continue cooking if it still runs easily.
- Once it reaches a thick, glossy texture that coats the spoon, remove it from the heat. Remember that Arequipe thickens slightly as it cools, so stop just before it reaches the final firmness.
- If you used a vanilla pod, remove it. For a perfectly smooth finish, strain the Arequipe through a fine sieve into a clean bowl. This step ensures a professional, silky result.
- Allow the Arequipe to cool to room temperature before transferring it to sterilised glass jars. Seal tightly and refrigerate once cooled completely.
- Serve Arequipe as a spread over toast, a filling for pastries, or a topping for ice cream and fruit. It is a classic addition to obleas (Colombian wafers).
- For a charming finish, drizzle over desserts and sprinkle with a few flakes of sea salt for contrast. The subtle salt enhances the caramel notes beautifully.
Nutrition
Serving: 1Calories: 292kcalCarbohydrates: 75gProtein: 0.01gFat: 0.4gSaturated Fat: 0.01gMonounsaturated Fat: 0.003gCholesterol: 0.03mgSodium: 274mgPotassium: 2mgSugar: 75gVitamin A: 0.4IUCalcium: 1mgIron: 0.04mg
Tried this recipe?Let us know how it was!