
- View
Walk into any Navajo gathering and you’ll likely catch the unmistakable aroma of fresh fry bread sizzling in hot oil. This golden, pillowy creation has become synonymous with Native American cuisine, yet its story runs much deeper than most people realise.
Fry bread represents both celebration and survival, carrying within its simple ingredients a complex narrative of resilience and adaptation. What might appear as just another fried dough to outsiders holds profound cultural significance for the Navajo people and many other Native American tribes.
Want to dive deeper into American Cuisine? Don’t miss our post on 65 Traditional American Foods to Try
What Is Navajo Fry Bread?
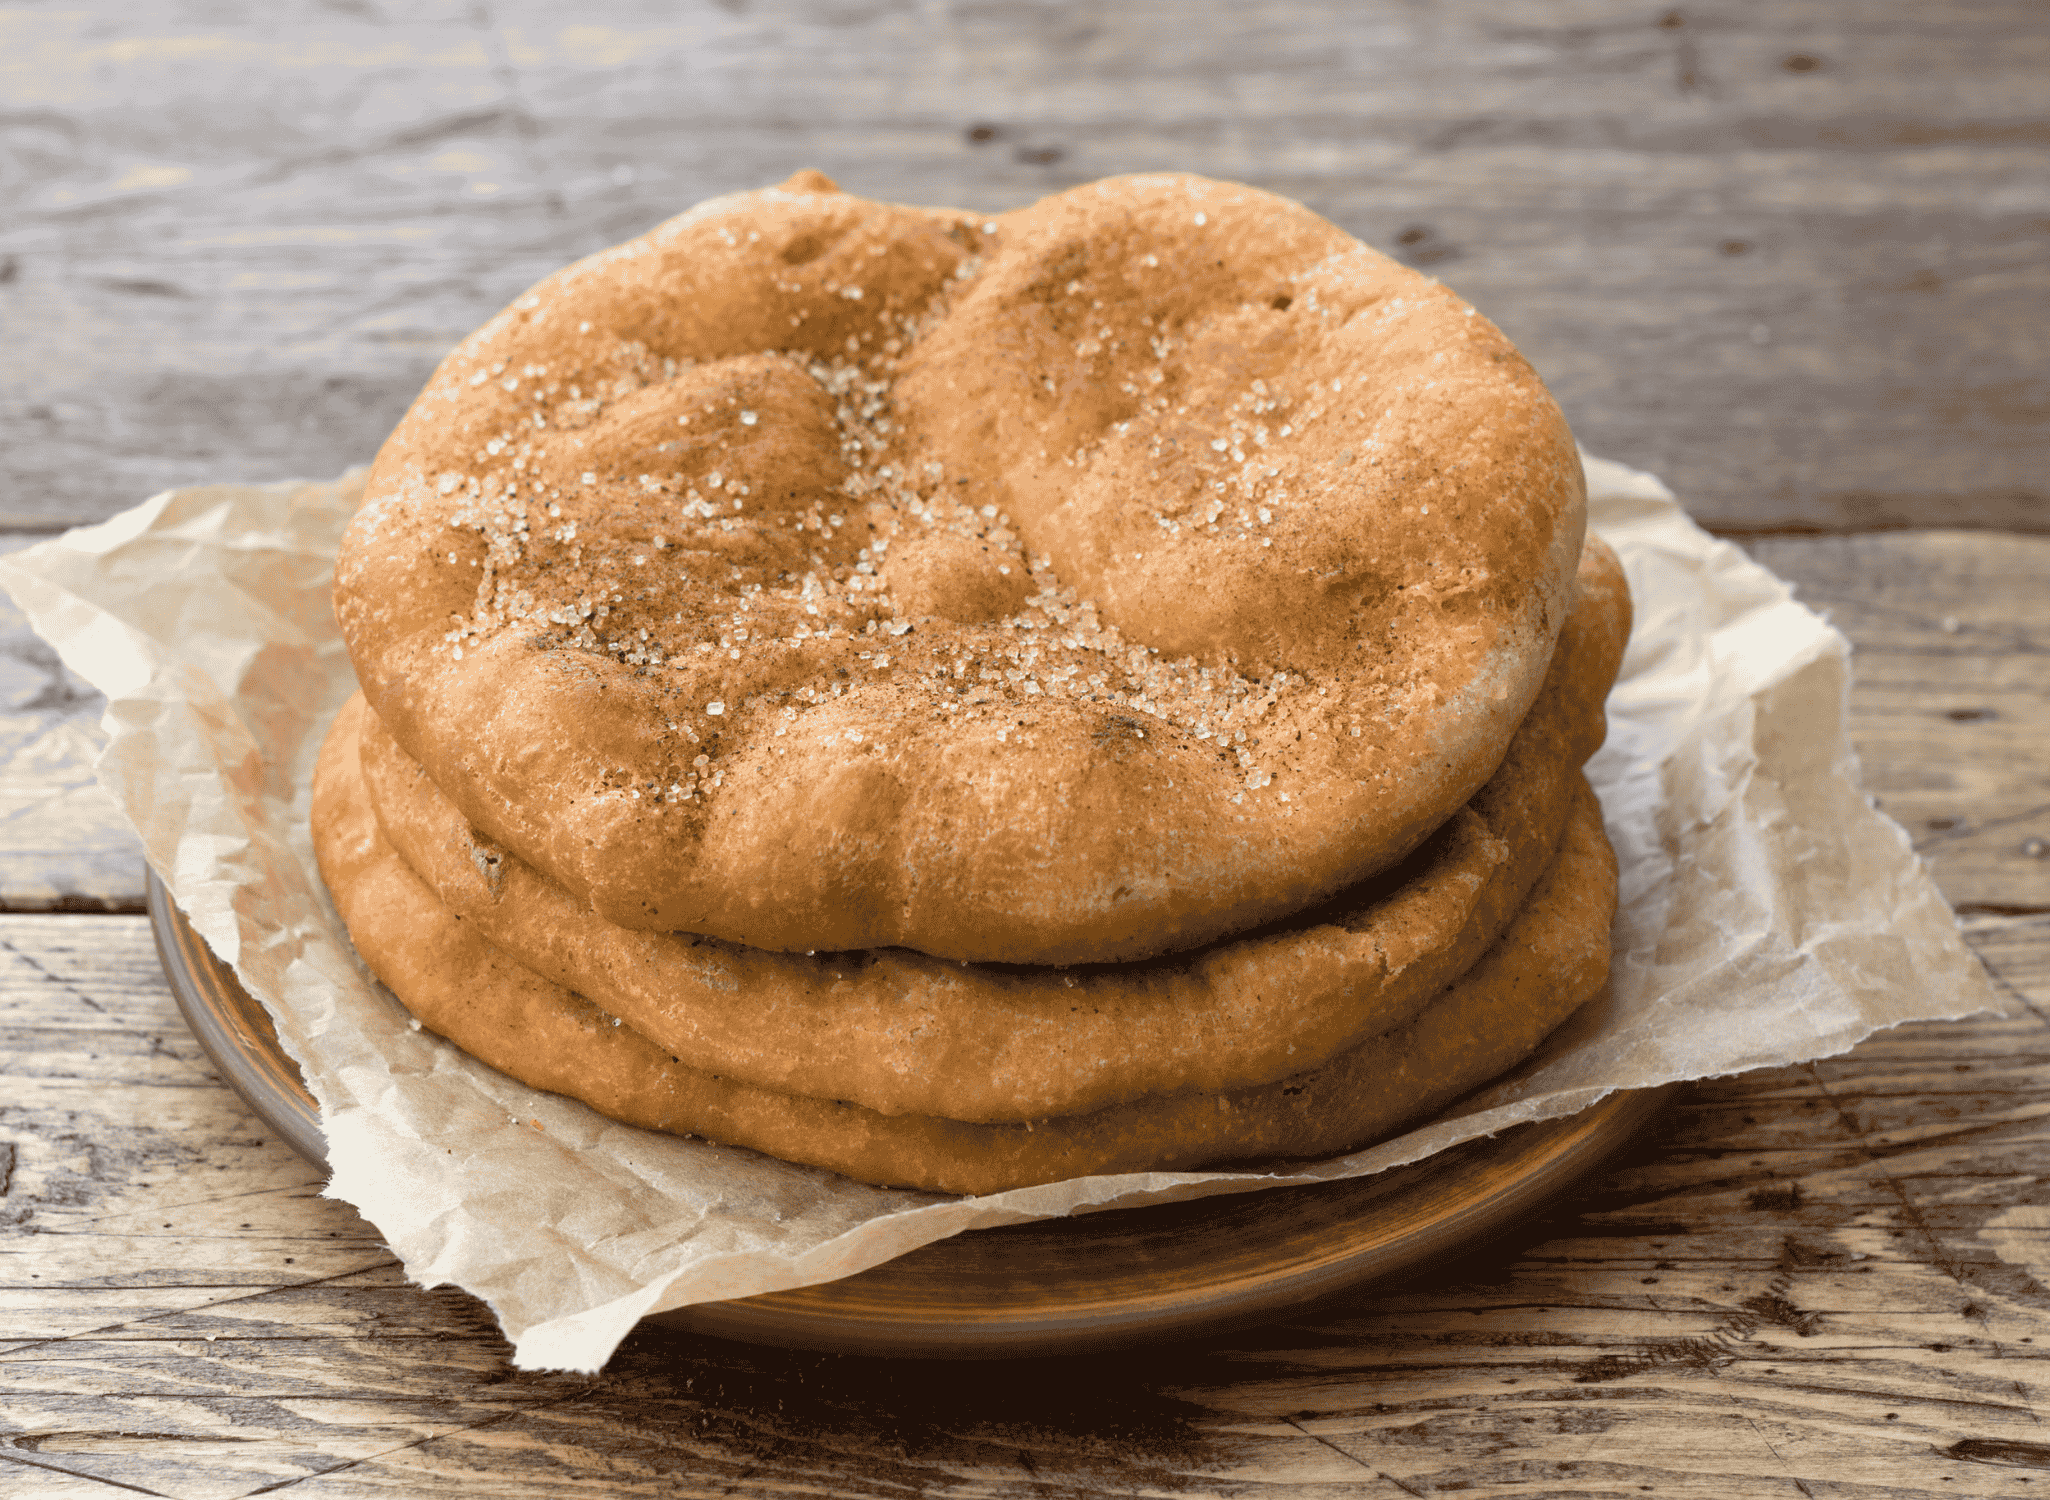
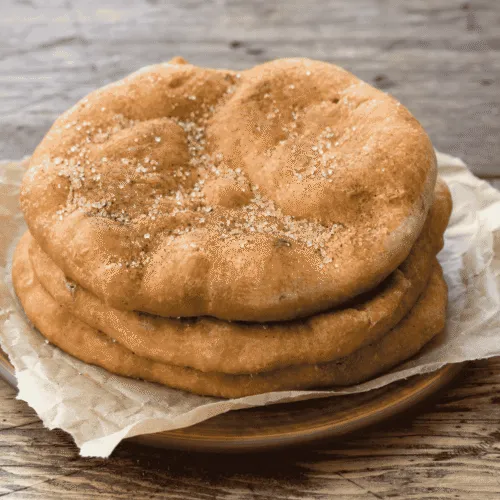
Picture a piece of dough that’s been lovingly stretched by hand until it’s thin enough to see through, then dropped into bubbling oil where it puffs and transforms into something magical. That’s fry bread in its purest form. The result is a flat, round piece of bread with a crispy exterior that gives way to a soft, airy interior.
Unlike many traditional breads that rely on yeast for leavening, fry bread achieves its characteristic texture through the steam created when the dough hits the hot oil. Each piece is unique, bearing the marks of the hands that shaped it and the oil that cooked it to golden perfection.
Ingredients and Taste
The beauty of fry bread lies in its simplicity. Traditional recipes call for just flour, baking powder, salt, and water, though many families add a touch of milk or lard for extra richness. Some modern variations include a pinch of sugar, but the original versions kept things refreshingly straightforward.
When you bite into properly made fry bread, you experience a delightful contrast of textures. The outside crackles with a satisfying crunch whilst the inside remains tender and slightly chewy. The flavour is subtle and comforting, with a hint of saltiness that makes it versatile enough to pair with both sweet and savoury toppings.
A Taste of History
The origins of fry bread tell a story that’s both bitter and beautiful. During the 1860s, the US government forced thousands of Navajo people from their ancestral lands in what became known as the Long Walk. Relocated to internment camps at Bosque Redondo, they were given government rations of white flour, refined sugar, and lard.
Out of necessity and creativity, Navajo women transformed these foreign ingredients into something sustaining and familiar. Fry bread became a symbol of survival, representing how a displaced people could create something nurturing from the most challenging circumstances.
Today, fry bread carries this duality wherever it appears. At powwows and family gatherings, it’s often served as Indian tacos, topped with beans, meat, lettuce, and cheese. Sweet versions might be dusted with powdered sugar or drizzled with honey. Each bite connects the present to a past that refuses to be forgotten, making fry bread not just food, but a living piece of history that continues to nourish both body and spirit.
How to Make Traditional Navajo Fry Bread
Creating authentic Navajo fry bread connects you to centuries of tradition through the simple act of mixing, kneading, and frying. This sacred bread transforms basic pantry ingredients into golden pillows of comfort that can be enjoyed sweet or savoury. The key lies in developing the right dough consistency and maintaining proper oil temperature for that perfect crispy exterior and tender interior. See the recipe card at the bottom for printable directions
Ingredients
- 2 cups plain flour
- 2 teaspoons baking powder
- 1 teaspoon salt
- 3/4 cup warm water
- 2 tablespoons lard or vegetable shortening (optional, for traditional richness)
- Vegetable oil for deep frying (approximately 2 cups)
Cooking Instructions
Step 1: Prepare the Dry Mixture
To begin, combine the flour, baking powder, and salt in a large mixing bowl. Whisk these dry ingredients together thoroughly to ensure even distribution of the leavening agent. This foundation mixture should be completely uniform before adding any liquids, as uneven mixing can result in inconsistent texture in your finished bread.
Step 2: Create the Dough
Make a well in the centre of your flour mixture and gradually pour in the warm water whilst stirring with a wooden spoon. If using lard or shortening, work it into the mixture at this stage. The dough should come together without being sticky or overly dry. Add water by the tablespoon if the mixture seems too crumbly, or dust with flour if it becomes too wet.
Step 3: Knead to Perfection
Transfer the dough onto a lightly floured surface and knead gently for 3 to 4 minutes until it becomes smooth and elastic. Traditional Navajo fry bread dough should feel soft and pliable, similar to pasta dough. Avoid overworking, as this can make the bread tough rather than tender.
Step 4: Rest the Dough
Place the kneaded dough back in the bowl and cover with a clean tea towel. Allow it to rest for 15 to 20 minutes at room temperature. This resting period helps the gluten relax, making the dough easier to stretch and shape whilst ensuring a more tender final product.
Step 5: Heat the Oil
Whilst the dough rests, pour vegetable oil into a heavy-bottomed pan or deep fryer to a depth of about 2 inches. Heat the oil to 180°C (350°F). Maintaining this temperature is crucial for achieving the characteristic texture of fry bread. Oil that’s too cool will result in greasy bread, whilst oil that’s too hot will burn the exterior before the interior cooks through.
Step 6: Shape the Bread
Divide the rested dough into 4 equal portions. Working with one piece at a time, gently stretch and pat each portion into a round disc approximately 6 to 8 inches in diameter. Traditional method involves stretching by hand rather than rolling, creating slightly irregular edges and varying thickness that adds to the authentic character.
Step 7: Test and Adjust
Before frying all portions, test the oil temperature by dropping a small piece of dough into the oil. It should sizzle immediately and rise to the surface within seconds. If the oil isn’t hot enough, the bread will absorb too much oil and become heavy.
Step 8: Fry the First Side
Carefully lower one piece of stretched dough into the hot oil. The bread should puff immediately and begin browning within 30 seconds. Fry for 1 to 2 minutes until the bottom becomes golden brown and crispy. Avoid pressing down on the bread whilst it fries, as this prevents proper puffing.
Step 9: Flip and Complete
Using tongs or a slotted spoon, carefully flip the bread to cook the second side. Fry for another 1 to 2 minutes until both sides are evenly golden. The finished bread should sound hollow when tapped and have a beautiful golden colour throughout.
Step 10: Drain and Serve
Remove the cooked fry bread from oil and place on paper towels or a wire rack to drain excess oil. Serve immediately whilst still warm for the best texture and flavour. Traditional accompaniments include honey, jam, or savoury toppings like beans and cheese for Indian tacos. The bread is best enjoyed fresh but can be reheated briefly in a warm oven if needed.
Cooking Tips for Perfect Navajo Fry Bread
- Keep oil temperature consistent by using a cooking thermometer and adjusting heat as needed between batches
- Don’t overcrowd the pan; fry one piece at a time for best results and temperature control
- Stretch dough by hand rather than rolling for authentic texture and appearance
- Work quickly when shaping to prevent dough from becoming too warm and difficult to handle
- Save a small piece of raw dough to test oil temperature before frying each batch
- Pat dough gently rather than aggressively stretching to avoid tearing
- Use a slotted spoon or spider strainer for safe and easy removal from hot oil
- Maintain a clean workspace and have all tools ready before beginning the frying process
- Consider the traditional significance: handle ingredients and process with respect for the cultural heritage
- Store any leftover dough covered in the refrigerator for up to 24 hours, bringing to room temperature before shaping
Navajo Fry Bread (Fried Flatbread)
Ingredients
- 2 cups plain flour
- 2 teaspoons baking powder
- 1 teaspoon salt
- 3/4 cup warm water
- 2 tablespoons lard or vegetable shortening optional, for traditional richness
- Vegetable oil for deep frying approximately 2 cups
Instructions
- To begin, combine the flour, baking powder, and salt in a large mixing bowl. Whisk these dry ingredients together thoroughly to ensure even distribution of the leavening agent. This foundation mixture should be completely uniform before adding any liquids, as uneven mixing can result in inconsistent texture in your finished bread.
- Make a well in the centre of your flour mixture and gradually pour in the warm water whilst stirring with a wooden spoon. If using lard or shortening, work it into the mixture at this stage. The dough should come together without being sticky or overly dry. Add water by the tablespoon if the mixture seems too crumbly, or dust with flour if it becomes too wet.
- Transfer the dough onto a lightly floured surface and knead gently for 3 to 4 minutes until it becomes smooth and elastic. Traditional Navajo fry bread dough should feel soft and pliable, similar to pasta dough. Avoid overworking, as this can make the bread tough rather than tender.
- Place the kneaded dough back in the bowl and cover with a clean tea towel. Allow it to rest for 15 to 20 minutes at room temperature. This resting period helps the gluten relax, making the dough easier to stretch and shape whilst ensuring a more tender final product.
- Whilst the dough rests, pour vegetable oil into a heavy-bottomed pan or deep fryer to a depth of about 2 inches. Heat the oil to 180°C (350°F). Maintaining this temperature is crucial for achieving the characteristic texture of fry bread. Oil that's too cool will result in greasy bread, whilst oil that's too hot will burn the exterior before the interior cooks through.
- Divide the rested dough into 4 equal portions. Working with one piece at a time, gently stretch and pat each portion into a round disc approximately 6 to 8 inches in diameter. Traditional method involves stretching by hand rather than rolling, creating slightly irregular edges and varying thickness that adds to the authentic character.
- Before frying all portions, test the oil temperature by dropping a small piece of dough into the oil. It should sizzle immediately and rise to the surface within seconds. If the oil isn't hot enough, the bread will absorb too much oil and become heavy.
- Carefully lower one piece of stretched dough into the hot oil. The bread should puff immediately and begin browning within 30 seconds. Fry for 1 to 2 minutes until the bottom becomes golden brown and crispy. Avoid pressing down on the bread whilst it fries, as this prevents proper puffing.
- Using tongs or a slotted spoon, carefully flip the bread to cook the second side. Fry for another 1 to 2 minutes until both sides are evenly golden. The finished bread should sound hollow when tapped and have a beautiful golden colour throughout.
- Remove the cooked fry bread from oil and place on paper towels or a wire rack to drain excess oil. Serve immediately whilst still warm for the best texture and flavour. Traditional accompaniments include honey, jam, or savoury toppings like beans and cheese for Indian tacos. The bread is best enjoyed fresh but can be reheated briefly in a warm oven if needed.


Leave a Review