

- View
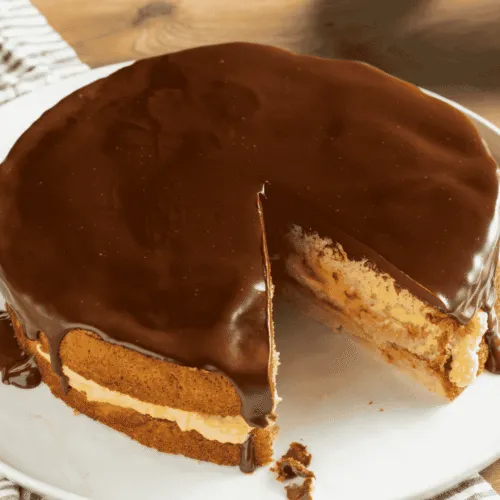
Boston Cream Pie is one of those desserts that quietly commands attention. It’s not a pie at all, but a layered sponge cake filled with silky custard and topped with a glossy chocolate glaze. The contrast of textures and flavours makes it a standout in American baking.
This dessert has long been associated with New England, particularly Boston, where it was first created. Its elegant appearance and rich filling give it a celebratory feel, yet it remains accessible enough to be a weekend baking project for home cooks.
Want to dive deeper into American Cuisine? Don’t miss our post on 65 Traditional American Foods to Try
What Is Boston Cream Pie?
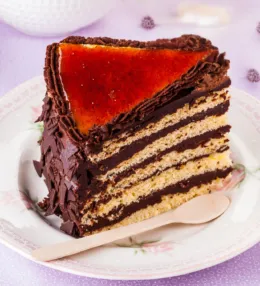
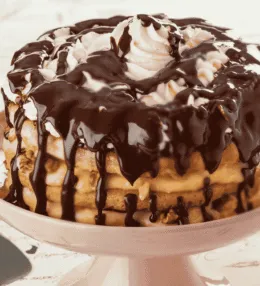
Despite its name, Boston Cream Pie is a cake through and through. It consists of two layers of light sponge cake, sandwiched with a thick layer of vanilla custard. The top is finished with a smooth chocolate glaze that sets to a soft sheen.
The structure is simple, but the result is anything but ordinary. The sponge is airy and tender, the custard adds a creamy richness, and the chocolate glaze brings a bittersweet finish. Each bite offers a balance of sweetness, texture, and depth.
Ingredients and Taste
The sponge cake is typically made with eggs, sugar, flour, and butter, sometimes enriched with milk or a touch of vanilla. The custard filling is a classic pastry cream, thickened with egg yolks and cornflour, and flavoured with vanilla for warmth and depth.
The glaze is usually a ganache or chocolate fondant, made by melting chocolate with cream or butter until smooth. The overall taste is rich but not cloying. The custard softens the cake layers slightly, while the glaze adds a touch of indulgence without overwhelming the palate.
A Taste of History
Boston Cream Pie was first served at the Parker House Hotel in Boston in the mid-19th century. Created by French-Armenian chef Augustine François Anezin, it was originally called “chocolate cream pie” or “custard cake” before settling into its now famous name.
At the time, cakes and pies were often baked in the same pans, and the terms were used interchangeably. The dessert’s layered structure and chocolate topping made it a novelty, especially as chocolate glazes were not yet common in American baking.
Over the years, Boston Cream Pie became a symbol of Massachusetts’ culinary heritage. In 1996, it was officially declared the state dessert. Its enduring popularity lies in its ability to feel both nostalgic and refined, a dessert that bridges tradition and elegance.
How to make Traditional Boston Cream Pie
Boston Cream Pie is a layered dessert that blends light sponge cake with smooth vanilla custard and a glossy chocolate glaze. It’s a refined yet nostalgic treat that rewards patience and precision. See the recipe card at the bottom for printable directions
Ingredients
For the sponge cake
- 3 large eggs
- 150 g caster sugar
- 120 g plain flour, sifted
- 30 g unsalted butter, melted and cooled
- 1 teaspoon vanilla extract
- Pinch of salt
For the custard filling
- 300 ml whole milk
- 3 large egg yolks
- 60 g caster sugar
- 25 g cornflour
- 1 teaspoon vanilla extract
- Pinch of salt
For the chocolate glaze
- 100 g dark chocolate (around 60 percent cocoa), chopped
- 100 ml double cream
- 1 teaspoon unsalted butter
Cooking Instructions
Step 1: Prepare the Sponge Batter
Preheat the oven to 180°C (fan 160°C). Grease and line a 20 cm round cake tin. In a large bowl, whisk the eggs and sugar over a pan of simmering water until warm and frothy. Remove from heat and beat until pale and thick.
Step 2: Fold and Bake
Gently fold in the sifted flour and salt using a spatula, taking care not to deflate the mixture. Drizzle in the melted butter and vanilla, folding just until combined. Pour into the tin and bake for 25 to 30 minutes until golden and springy.
Step 3: Cool the Cake
Let the cake cool in the tin for 10 minutes, then turn out onto a wire rack. Once fully cooled, slice horizontally into two even layers using a serrated knife. Set aside while you prepare the custard.
Step 4: Make the Custard Base
In a saucepan, heat the milk until just steaming. In a separate bowl, whisk the egg yolks, sugar, cornflour, and salt until smooth. Slowly pour the hot milk into the yolk mixture, whisking constantly to temper the eggs.
Step 5: Thicken the Custard
Return the mixture to the saucepan and cook over medium heat, stirring constantly until thickened and bubbling. Remove from heat and stir in the vanilla. Transfer to a bowl, cover with cling film touching the surface, and chill until set.
Step 6: Assemble the Layers
Place the bottom cake layer on a serving plate. Spread the chilled custard evenly over the surface, leaving a slight border. Gently place the second cake layer on top, pressing lightly to secure.
Step 7: Prepare the Glaze
In a small saucepan, heat the cream until just simmering. Remove from heat and add the chopped chocolate and butter. Let sit for a minute, then stir until smooth and glossy. Allow to cool slightly for easier spreading.
Step 8: Glaze the Cake
Pour the glaze over the top of the cake, letting it gently run to the edges. Use a spatula to guide it if needed. Avoid glazing the sides for a traditional finish. Let the glaze set at room temperature.
Step 9: Chill Before Serving
Refrigerate the assembled cake for at least 1 hour to allow the custard to firm and the glaze to set. This also makes slicing cleaner and more precise.
Step 10: For Serving
Slice with a sharp knife dipped in hot water for neat portions. Serve chilled or at room temperature. A dusting of icing sugar or a few fresh berries on the side adds a touch of elegance.
Cooking Tips for Perfect Boston Cream Pie
- Whisk the eggs and sugar thoroughly to achieve a light sponge
- Fold gently to preserve air in the batter
- Chill the custard fully before assembling to prevent sliding
- Use good quality chocolate for a smooth, glossy glaze
- Let the cake rest before slicing for clean layers
Boston Cream Pie (Custard Filled Chocolate Cake)
Ingredients
For the sponge cake
- 3 large eggs
- 150 g caster sugar
- 120 g plain flour sifted
- 30 g unsalted butter melted and cooled
- 1 teaspoon vanilla extract
- Pinch of salt
For the custard filling
- 300 ml whole milk
- 3 large egg yolks
- 60 g caster sugar
- 25 g cornflour
- 1 teaspoon vanilla extract
- Pinch of salt
For the chocolate glaze
- 100 g dark chocolate around 60 percent cocoa, chopped
- 100 ml double cream
- 1 teaspoon unsalted butter
Instructions
- Preheat the oven to 180°C (fan 160°C). Grease and line a 20 cm round cake tin. In a large bowl, whisk the eggs and sugar over a pan of simmering water until warm and frothy. Remove from heat and beat until pale and thick.
- Gently fold in the sifted flour and salt using a spatula, taking care not to deflate the mixture. Drizzle in the melted butter and vanilla, folding just until combined. Pour into the tin and bake for 25 to 30 minutes until golden and springy.
- Let the cake cool in the tin for 10 minutes, then turn out onto a wire rack. Once fully cooled, slice horizontally into two even layers using a serrated knife. Set aside while you prepare the custard.
- In a saucepan, heat the milk until just steaming. In a separate bowl, whisk the egg yolks, sugar, cornflour, and salt until smooth. Slowly pour the hot milk into the yolk mixture, whisking constantly to temper the eggs.
- Return the mixture to the saucepan and cook over medium heat, stirring constantly until thickened and bubbling. Remove from heat and stir in the vanilla. Transfer to a bowl, cover with cling film touching the surface, and chill until set.
- Place the bottom cake layer on a serving plate. Spread the chilled custard evenly over the surface, leaving a slight border. Gently place the second cake layer on top, pressing lightly to secure.
- In a small saucepan, heat the cream until just simmering. Remove from heat and add the chopped chocolate and butter. Let sit for a minute, then stir until smooth and glossy. Allow to cool slightly for easier spreading.
- Pour the glaze over the top of the cake, letting it gently run to the edges. Use a spatula to guide it if needed. Avoid glazing the sides for a traditional finish. Let the glaze set at room temperature.
- Refrigerate the assembled cake for at least 1 hour to allow the custard to firm and the glaze to set. This also makes slicing cleaner and more precise.
- Slice with a sharp knife dipped in hot water for neat portions. Serve chilled or at room temperature. A dusting of icing sugar or a few fresh berries on the side adds a touch of elegance.


Leave a Review